There are two methods that can be use. If one doesn't work for you try the other. For a more indepth explanation of relative positioned menus see this information and the related menu sample |
||
METHOD 1 |
||
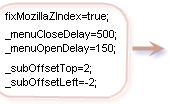
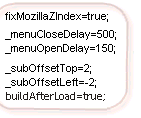
STEP 1: Open the menu_data.js file in a text editor and find this section |
At the bottom add: |
|
 |
 |
|
| STEP 2:
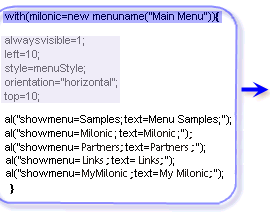
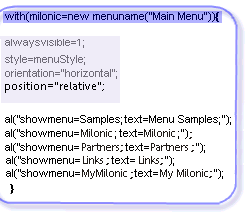
Find the Main Menu |
Remove the left and top positioning and add position="relative"; |
|
 |
 |
|
STEP 3: |
||
| On the webpage where you are placing the menu, go to the table cell or div where you want the menu to show, and place the calls for all files in that cell or div. Make sure you use the path on your web directory to the files. | <TD> <script type="text/javascript" src="milonic_src.js"> </script> |
|
| METHOD 2 | ||
| STEP 1:
Open the menu_data.js file and find the main menu |
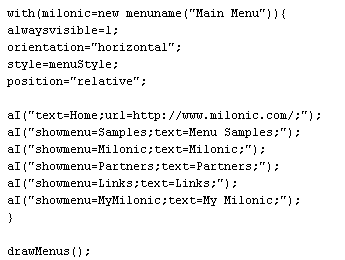
Remove the left and top positioning and add position="relative"; Then cut this main menu from the menu_data.js file and paste it into its own file. Finally add a drawMenus(); at the end of the file |
|
 |
 |
|
| STEP 2:
Save the new file with the main menu in it as embedded_main_menu.js |
||
| STEP 3:
Save the original menu_data.js file with the main menu no longer in it as subs_data.js. There is still a drawMenus(); at the end. You now have two menu files. One with the styles and submenus in it and a drawMenus(); at the end, and one with only the main menu in it and a drawMenus(); at the end of that file, also. |
||
| Step 4:
Place the call for all but the main menu file immediately after the body tag |
<BODY> <script type="text/javascript" src="milonic_src.js"> </script> |
|
| STEP 5:
Place the call for the main menu file in the table cell or div where you want it to appear |
<TD> |
|
Download Table Example |
||